Hooking it up!
All you need to do to get started is to plug your board into your computer using a USB-C Power + Data cable.
Your ESP32-S3 board ships with CircuitPython pre-installed and has some hello world code on it that runs when you power it up.
Once it starts up, you'll see a USB drive appear in your filesystem called CIRCUITPY and on the drive, you'll find a file named code.py that is currently running on your board. If you are new to CircuitPython, or would like to level up your CircuitPython skills, please check out Adafruit's Welcome to CircuitPython learn guide.
Coding Platforms
You are able to develop on your ESP32-S3 in a variety of languages and platforms.
Info for the most popular platforms, Espressif IDF, Arduino, CircuitPython and MicroPython are listed below, but other interesting languages are becoming available as well, like RUST and Go (TinyGO).
CitcuitPython
Your board ships with the latest version of CircuitPython!
It also ships with the UF2 bootloader, so you can easily update your board with the latest CircuitPython firmware, whenever you desire.
Just plug your board into your computer and it will appear in your filesystem as a USB flash drive! Just copy your code over, or edit your code directly on the drive. Coding a microcontroller has never been easier!
As newer versions of CircuitPython are released, you are able to update to them as you require from circuitpython.org
If you need to grab the shipping CircuitPython code that comes with your board,
you can grab the latest here
MicroPython
MicroPython has excellent support for the ESP32, and that includes the ESP32-S3.
If you would like to put MicroPython on your new board, please follow the flashing guide for your board from this firmware link and don't forget to erase your flash first!
For more information about developing projects on your new board, using MicroPython, check out the MicroPython documentation.
Unlike CircuitPython and the STM32 port of MicroPython, the ESP32 port of MicroPython does not present you with a Mass Storage Drive to add/copy/edit code.
It presents you with a USB serial port, and you need to use a tool like mpremote to access the file system to add/copy/edit files.
Espressif IDF
ESP32-S3 support in the IDF is part of the v4.4 release. The latest IDF is v5.0, but it's in early development, so I recommend you stick to the v4.4 release branch for the time being as there are some low level breaking changes in v5.
Check out the ESP32-S3 IDF Docs for information on how to install it and develop for the ESP32-S3
Arduino IDE
Firstly, please make sure you have downloaded and installed the Arduino IDE for your OS if you have not already installed it.
Then, if you have not already setup your Arduino IDE environment to work with ESP32, or you are still on version 1.0.6 of the ESP32 Arduino Core, please follow the official Espressif ESP32 Arduino Core instructions to install/update it.
Arduino support for the ESP32-S3 is available in the Espressif ESP32 Arduino Core 2.0.3 and later. Please install the latest version to be able to select ESP32-S3 boards with the latest fixes and features.
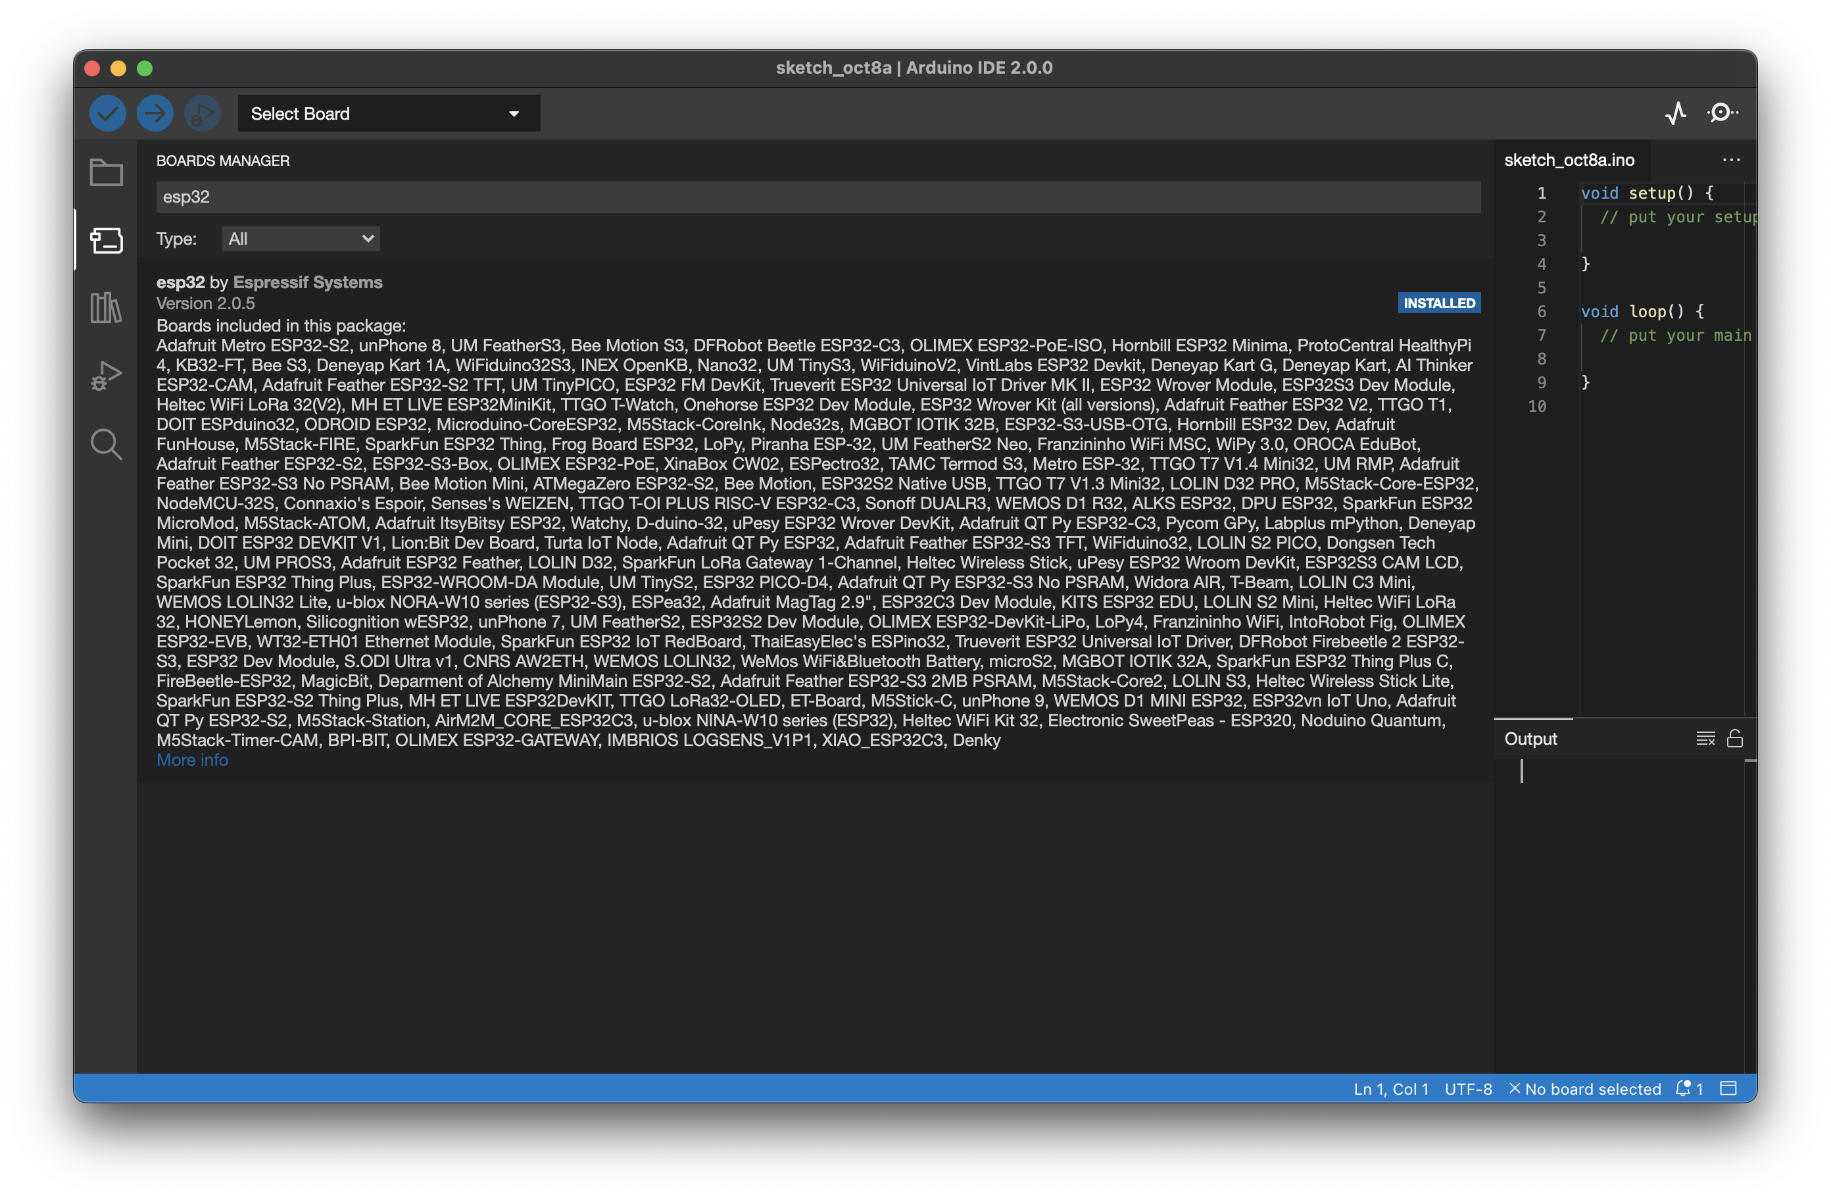
You can install this version from the Arduino IDE board manager (Image is the new Arduino IDE 2):
If you want to live on the bleeding edge, feel free to stay on the latest version by cloning this repo instead.
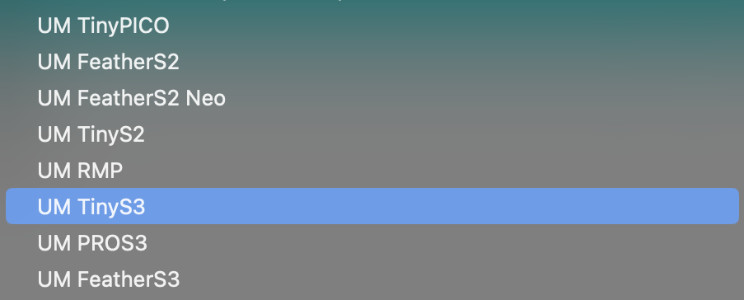 Once the ESP32 boards support is installed, you can select your new board from the boards drop down list.
You are looking for UM TinyS3, UM ProS3 and UM FeatherS3.
PlatformIO
PlatformIO support is a bit fractures for Espressif MCUs right now. Official support stops at ESP32 Arduino Core 2.x, which is old now, but you can use the ESP32 Arduino Core 3.x by using the ESP32 Core provided by the PIOARDUINO.
You replace
[env]
platform = platformio/espressif32
with
[env]
platform = https://github.com/pioarduino/platform-espressif32/releases/download/stable/platform-espressif32.zip
When using the PlatformIO for development, you need to ensure you enabled the USB peripheral when your code runs, or you will not see a serial port to re-flash or get any serial output. To enable the USB peripheral, you need to add:
build_flags =
-D ARDUINO_USB_CDC_ON_BOOT=1
Here’s an example of how to use an UM Feather S3 in platformIO. This is in the platformio.ini file:
[env]
platform = platformio/espressif32
board = um_feathers3
framework = arduino
; Waiting isn't needed for CDC/JTAG USB mode
board_upload.wait_for_upload_port = false

lib_deps =
	Wire
	SPI
	; Add your other libraries here

build_flags =
	-D ARDUINO_USB_MODE=1 ; CDC/JTAG USB mode
	; Needed for USB to enumerate when user code starts
	-D ARDUINO_USB_CDC_ON_BOOT=1
I have a full PlatformIO example project for the FeatherS3 on GitHub.
The example can be altered to work with any other UM board by changing the line
board = um_feathers3
To any other UM board.
NEW! nanoFramework

You can now use the amazing nanoFramework on your Unexpected Maker ESP32-S3 boards!
nanoFramework is an embedded version of the .NET framework, which allows you to develop in C# on your microcontroller - how cool is that!
Check out the nanoFramework website for information on how to install it and develop for the ESP32-S3
Flashing Code Onto Your Board
From time to time, you might want to try out different programming languages on your ESP32-S3 board, or you might just want to update the version of CircuitPython or MicroPython you are using. To achieve this, you'll need to learn how to put your board into different boot modes.
Unexpected Maker ESP32-S3 boards ship with CircuitPython flashed on them. If you want to re-flash your board with the IDF or Arduino IDE, or even install MicroPython firmware, you have to put your board into DOWNLOAD mode for the first flash as the serial port you might see listed from CircuitPython is not able to be flashed directly.
Getting into DOWNLOAD Mode
Putting your board into Download Mode will force your board to restart in the CDC bootloader mode and enumerate a new serial device (COM port for Windows users). Form there you can flash the board using that serial port.This mode is used to flash a new version of the UF2 bootloader, or a new version of MicroPython onto your board, or even to flash some IDF or Arduino Code, if you are not enabling the native USB on boot-up.
To get your board into Download mode:
- Press and hold the [BOOT] button down
- Press and Release the [RESET] button
- Release the [BOOT] button
Getting into UF2 Bootloader Mode
Putting your board into UF2 Bootloader will force your board to restart and present you with a USB mass storage device in your file explorer - assuming you have the UF2 bootloader still installed and you have not stomped it by flashing Arduino, MicroPython or IDF code on the board.All Unexpected maker ESP32-S3 boards ship with CircuitPython and the UF2 Bootloader installed by default.
To get your board into UF2 bootloader mode:
- Press and Release [RESET]
- When the RGB LED is turns purple, Press and Release [BOOT]
Flashing in the Arduino IDE
When using the Arduino IDE for development, there are a few things you need to be aware of.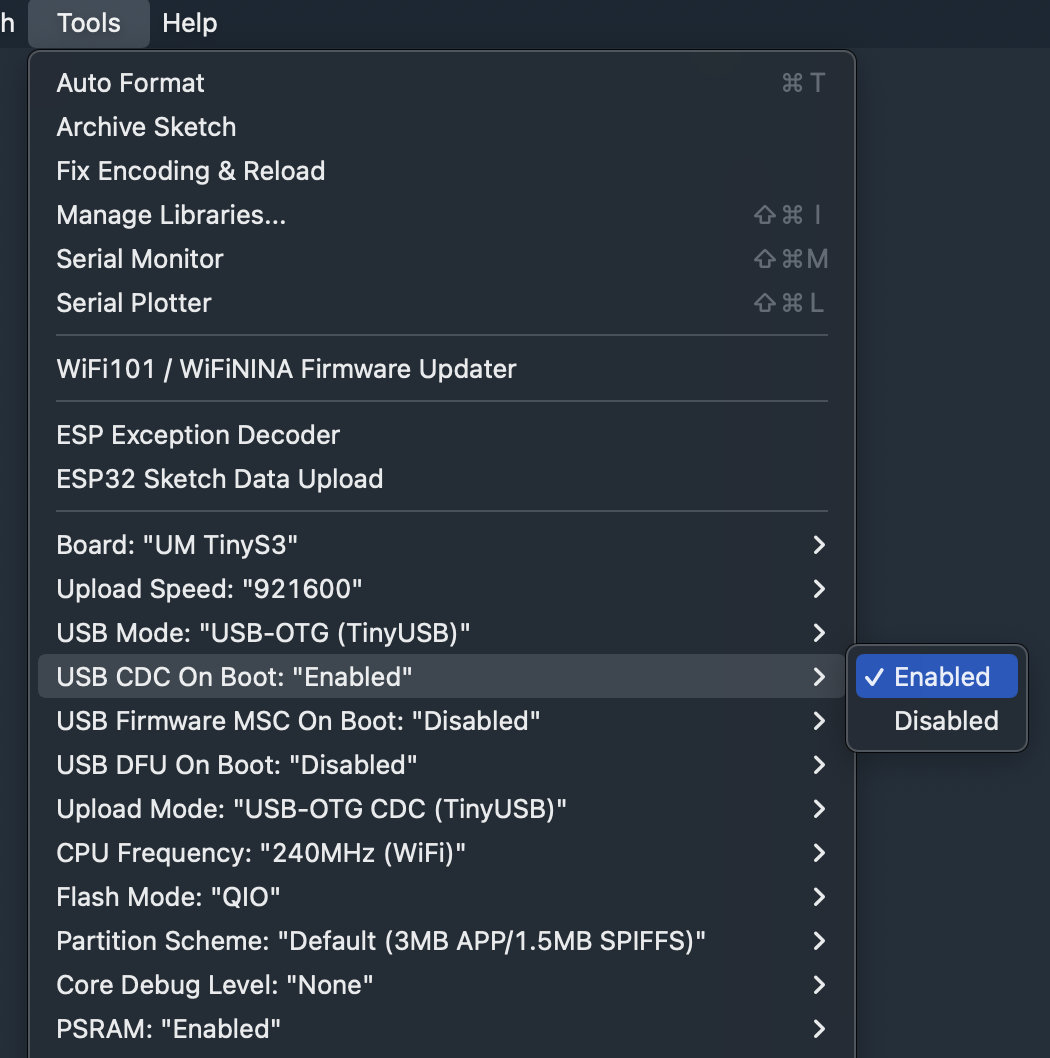 The Unexpected Maker ESP32-S3 boards leverage the native USB inside the S3 chip and do not use an external SerialUART chip like older ESP32 boards did. This means you need to enable the CDC on boot option in the Arduino IDE tools menu to ensure the native USB is enabled when your code runs.
Please also select the USB OTG (TinyUSB) option and ensure you have selected the correct UM Board definition from the boards list:
UM Tinys3, UM FeatherS3 & UM ProS3
NOTE! There is a ROM Mask bug in the current ESP32-S3 silicon that prevents the flashing process from resetting the board after flashing has finished, which means for now, you need to manually press the [RESET] button after flashing to manually reset the board so your code start running. Updated silicon from Espressif will fix this issue hopefully!
Powering From Battery
Your ESP32-S3 boards comes with support for using a battery to power your projects as well as the ability to charge your battery off the USB connector (or 5V pin if you are using an external 5V power supply).
The TinyS3 comes with a separate JST PH connector that you can solder onto the bottom of the board, as well as a VBAT header pin next to a GND pin to allow you to connect a battery via the headers.
The FeatherS3 and ProS3 come with a battery connector on the board. The FeatherS3 has a JST PH connector and the ProS3 has a PicoBlade connector. Both also a VBAT header pin next to a GND pin to allow you to connect a battery via the headers.
You can use any size, single cell Li-Po battery to power your ESP32-S3 boards. Obviously, the larger the mAH rating of the battery, the longer it will last.
Please use LiPo-Batteries with charge protection included on them. Most hobby RC batteries do not have over discharge protection, and if a battery discharges too much, it can damage it and it might never be able to hold a proper charge again.
NOTE: When connecting a battery to your ESP32-S3 board, please check the polarity of the battery, as not every battery is wired the same way. The IC I use for charging does have in-built reverse voltage protection, but it’s better not to tempt fate!
Helper Libraries
I have put together helper libraries for CircuitPython, MicroPython & Arduino to help you access certain functions of your ESP32-S3 board in an easy way.
The Arduino Helper Library is downloaded from the library manager within the Arduino IDE. Please search for the library called UMS3 Helper
The MicroPython version of the helper is compiled into the firmware itself, where as the CircuitPython version is sitting in the filesystem on your board.
The included CircuitPython code that runs when your board powers up uses the helper library to do certain things, like cycle the RGB LED, turn the RGB LED power on (or the second LDO if the board is a FeatherS3 or ProS3) and it shows you how much Flash and RAM you have free.
You can also use the helper library to see if there is 5V power present:
import tinys3
print(f"5V present? {tinys3.get_vbus_present()}")
Or check the battery voltage if one is connected:
import tinys3
print(f"VBAT voltage is {tinys3.get_battery_voltage()}v")
For MicroPython or CircuitPython, use the tinys3.py, feathers3.py & pros3.py helper library for each board, and for Arduino, there's one helper library for all 3 boards.